Today I am going to show you the last of the travel boxes I made. This one was a little bit more specific, as the recipient was a fan of a certain show. You could easily replicate this with any simple cartoon, even if you aren’t crafty. I promise!
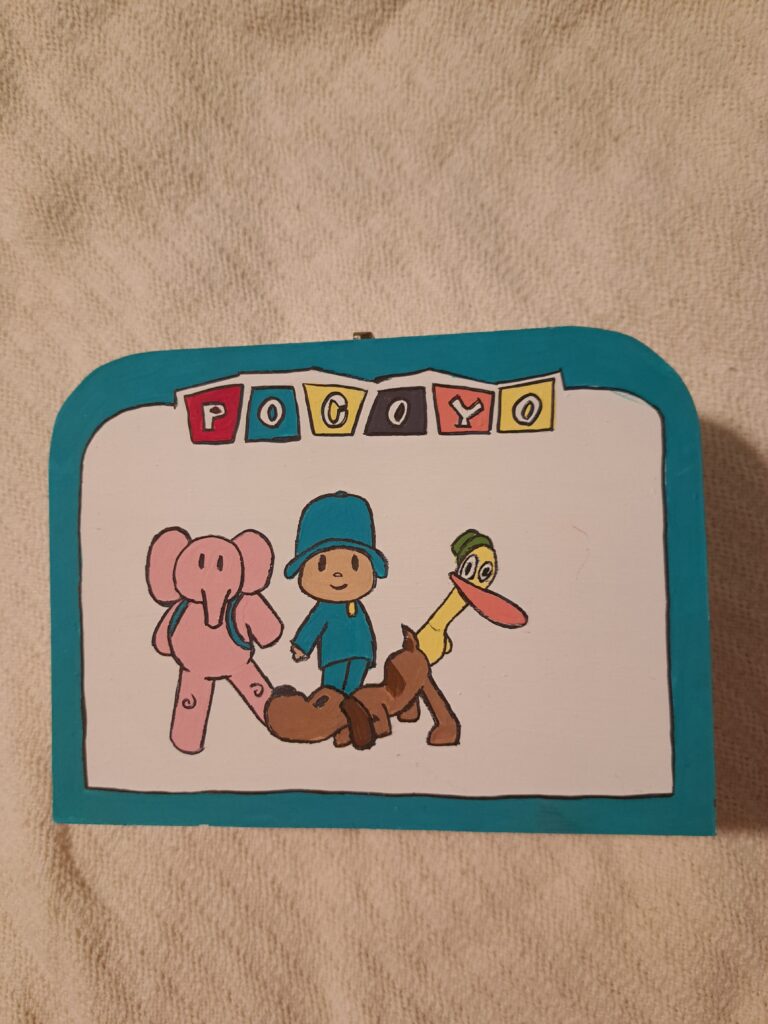
To start with, I painted the box a plain white. Then I drew the characters on the lid. If drawing the characters feels intimidating, there are lots of other options though! You could print out a picture and glue it on. You could glue on a colouring page with the characters if you can find one, and then paint within those lines if you wanted to try painting it yourself. You could even keep it simple by sticking to the theme colours of the show, or using stickers to decorate it.
Inside the next step is to glue in your felt board. This is just a piece of felt cut to the size of your lid. I used two layers for mine, but that was partially to get the effect of the blue frame like in the intro to the show, and partly to make up for the felt being a bit thinner than I had hoped. If you have a decent quality of felt one layer should be perfectly fine.
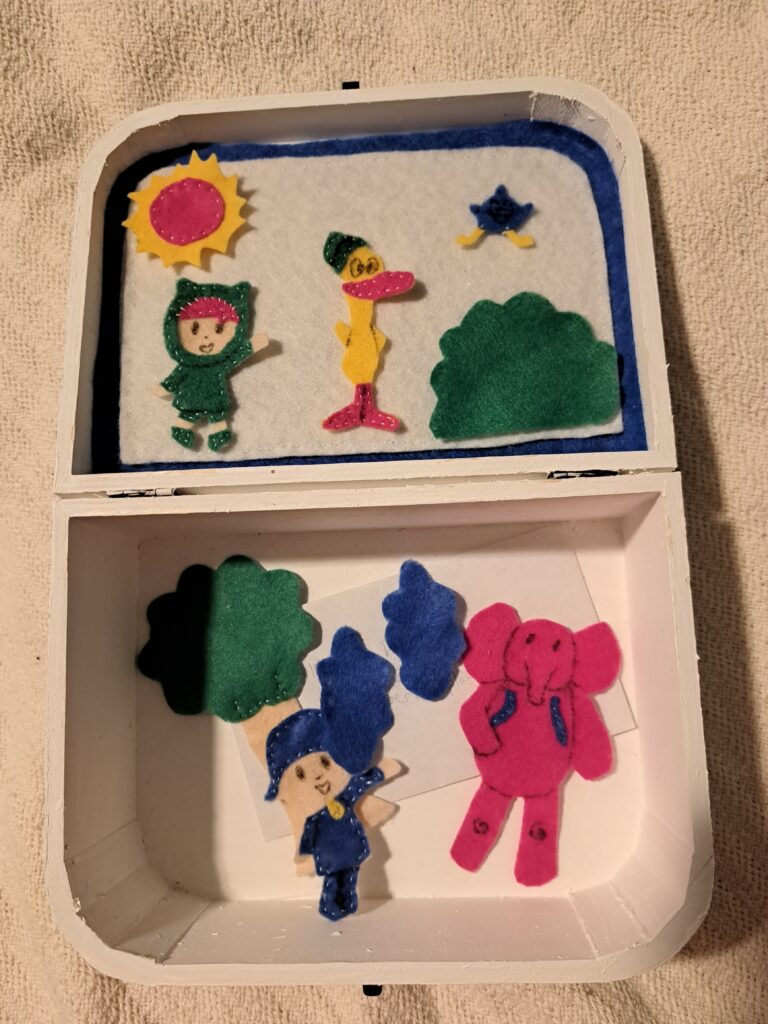
Now it is time for you to populate your little world! I chose to sew mine, but that isn’t necessary for this to work. I just like sewing and they were simple shapes. If you chose to do the same, draw or print off simple outlines of the character. Then cut them out as your pattern pieces. I drew on a few smaller details with a sharpie.
If sewing the characters doesn’t appeal to you, don’t worry! You have options. Realistically, only the back of the character needs to be felt for it to stick to the board. All you really need to do is to source a flat image of your characters, on something that can be glued to a felt backing. (Sunday school flashbacks anyone?)
I can think of a few different ways that you could do that. By far the easiest would probably be finding some good quality stickers of your characters. I would suggest using glue to hold them to the felt though. The adhesive on the back of stickers probably won’t be strong enough on it’s own.
The most durable option would be to find some fabric with your characters on it, and then to glue or sew that onto a felt backing. That would be even sturdier than the characters I made and would last the longest.
The third option is probably the most accessible. You could just print off an image of the character. Personally I would suggest using cardstock, since you will need it to stand up to the glue when you attach the felt backing. This will be the most fragile of the options, but it is also the easiest to replace. If your people are looking the worst for the wear, just reprint them!
So, what do you think of these boxes? Thinking of giving one a try the next time you travel? Dreaming of pretty little boxes to bring out during quiet time? Just want to keep tiny little pieces of some activity contained? I would love to hear how you personalize them!

Want more Hodgepodge Homesteading? Here’s where else you can find us!
On Instagram: @hodgepodgehomesteading
On Facebook: https://www.facebook.com/profile.php?id=100092368241618
On Pinterest: https://www.pinterest.ca/hodgepodgehomesteading/